If you are submitting a bug report or a support ticket, it will be very helpful if you can also submit your debug.log file that includes details of the error occurring.
Rather than displaying errors on your page, when you enable WordPress debug log the errors will be written to wp-content/debug.log – that makes it easy to send us the specific error messages you are experiencing. This article explains how to do that.
Add debug definitions to wp-config.php to enable WordPress debug log
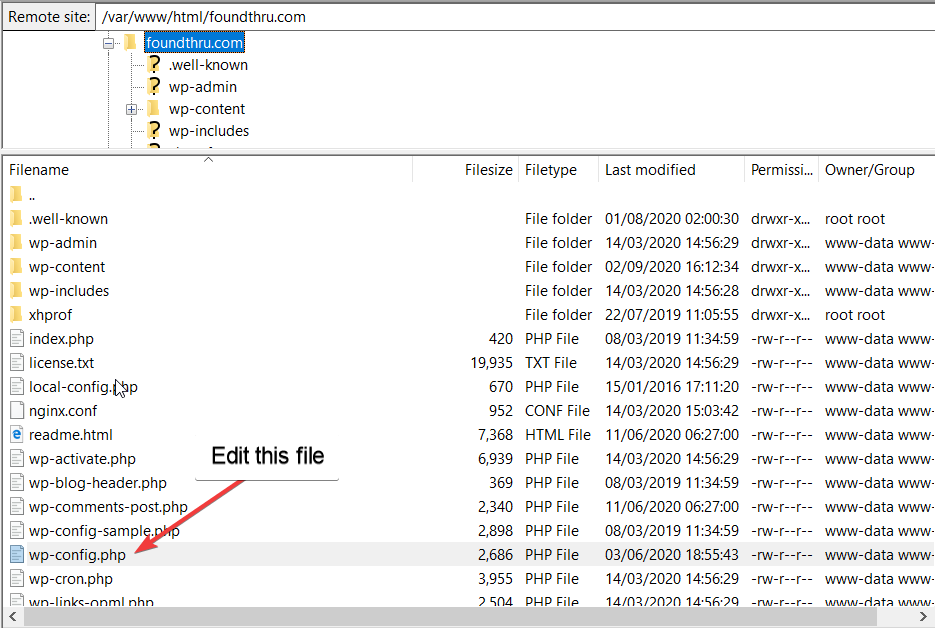
Open your wp-config.php file – this will be located either in the folder that contains your wp-content folder, or one folder up from there.

Inside this file, check and see if you already have a line that looks like this:
define( 'WP_DEBUG', true);
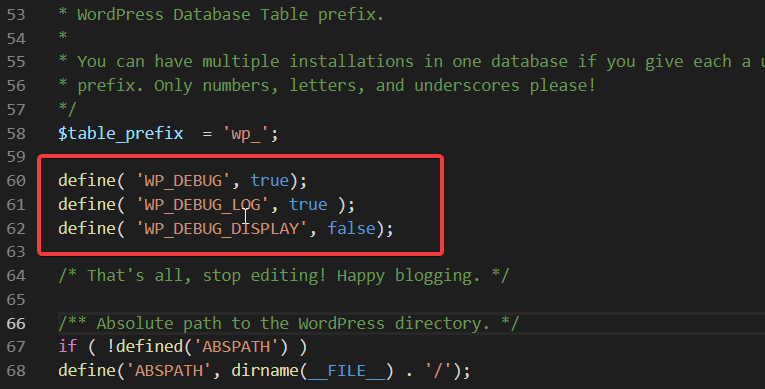
It may say ‘false’ instead of true. If that line is already there, replace it with the following 3 lines:
define( 'WP_DEBUG', true);
define( 'WP_DEBUG_LOG', true );
define( 'WP_DEBUG_DISPLAY', false);
If you do not already have the WP_DEBUG line of code in your wp-config.php file then paste the 3 lines from above before the following comment:
/* That's all, stop editing! Happy blogging. */
That means your file will look like this:

Save your file and upload it to your server – if you are using FileZilla (we recommend it) then save the file, bring Filezilla to the front and it will ask you if you wish to upload the file. Click to confirm and your debug.log file will now be enabled.
Rerun the problem to collect the error messages to debug.log
Now that you have the debug.log file enabled, re-run whatever problem you were experiencing. One advantage of the debug.log file is that it also collects normally invisible errors that occur over Ajax.
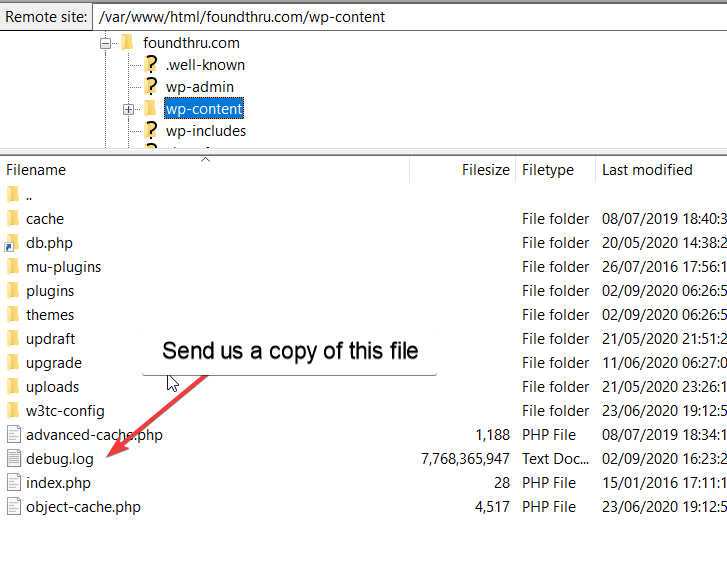
Once you have re-run whatever broken functionality you’ve been experiencing, if you refresh the wp-content folder using Filezilla you’ll see a debug.log file contained within there.

You can now download the debug.log file and attach it to your ticket when reporting any bug to us.


